Do you need to move data from one iPhone to another or from an iPhone/iPad to a Mac? Using airdrop is always a wonderful option that springs to mind first. What if AirDrop not working when it’s needed? If you’re having trouble with this, here’s a guide with solutions to the “Airdrop now working” issue that you might find helpful.
Five of the six tips are for fixing AirDrop not working, while the last is for transferring data across iOS devices in a different way. If AirDrop not working on your iPhone, you should be able to troubleshoot and resolve the issue using the methods listed below.
Concerns Must Be Addressed Before Fixing Airdrop Not Working On iPhone
Before you use Airdrop, there are a few things you should consider. These details allow you to rule out the causes that are causing the problem with Airdrop not working properly. Use your iPhone or iPad to check it out.
1. Determine whether your devices are running iOS 7 or Mac OS X Lion (10.7) or later.
2. Before enabling Airdrop, turn on Bluetooth and Wi-Fi on your iOS devices.
3. The ideal distance between the two devices to make sure the transfer is safe is about 30 feet.
Fix AirDrop Not Working On the iPhone
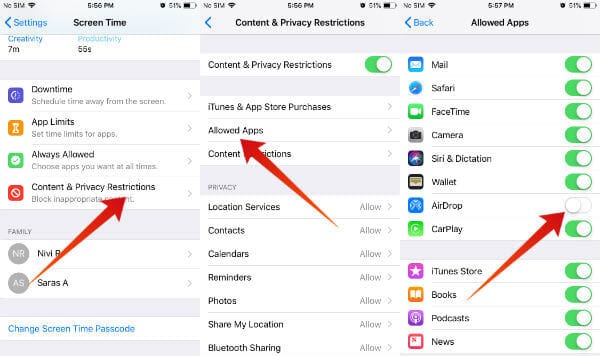
AirDrop makes transferring files, photos, and videos between two Apple devices a breeze. While AirDrop usually works without a hitch, it might occasionally malfunction owing to wrong settings or network issues. If your device’s AirDrop option is greyed out, follow this guide: How to Fix AirDrop Greyed Out on iPhone and Missing on Mac. If the AirDrop icon isn’t greyed out yet and AirDrop not working, try the troubleshooting options listed below.

1. Confirm that your device is compatible
The sending device must be an iPhone 5 or later, an iPad 4 or later, or an iPod 5th generation or newer to use AirDrop. Similarly, the receiving device must be an AirDrop-enabled device (iPhone 5 or later, iPod 5th Generation). If you want to use AirDrop to transfer files from your iPhone to your Mac, you’ll need a Mac that’s from 2012 or later and running OS X Yosemite or a later version of macOS.
2. Enable Bluetooth and WiFi
Bluetooth is required for AirDrop to locate nearby devices, and WiFi is required for data transfer. As a result, make sure both the sending and receiving devices have WiFi and Bluetooth turned on.
1. Navigate to Settings > WiFi and double-check that WiFi is enabled.
2. Go to Settings > Bluetooth and make sure it’s turned on.
3. Ensure that both devices are visible.
3. To use AirDrop, both the sender and receiver must be able to be found
1. From the drop-down menu, select Settings > General > AirDrop.
2. Select either “Everyone” or “Contacts Only” on the following screen.
The receiving device, likewise, must be discoverable.
4. Disable the “Do Not Disturb” Mode
If Do Not Disturb Mode is active on the sending or receiving device, AirDrop will not work.
1. Go to “Do Not Disturb” > “Settings.”
2. Move the toggle to the “OFF” position on the following screen to turn off Do Not Disturb mode.
Check to see if the receiving device is in Do Not Disturb Mode as well.
5. Disable the personal hotspot
If your device’s personal hotspot is activated, AirDrop will not work.
1. Select Settings > Cellular > Personal Hotspot from the drop-down menu. 2.
2. On the following screen, toggle the toggle to the OFF position to disable Personal Hotspot.
6. Make AirDrop available to everyone
AirDrop gives you the choice of sharing data with “Contacts Only” or “Everyone.”
Since you’re having issues, choose the option to “Share Data with Everyone” and see if that helps you solve the problem.
1. From the drop-down menu, select Settings > General > AirDrop.
2. On the following screen, select Everyone.
Note: If you want to use AirDrop in “Contacts Only” mode, you must sign into iCloud on both the sending and receiving devices.
7. Restart your iPhone To Fix AirDrop not working on iPhone
If your iPhone isn’t working, it could be due to a minor technical issue that can be resolved by restarting the device.
1. Go to Settings > General > Shut Down at the bottom of the page.
2. Slide the slider to turn off the iPhone on the following screen.
3. Hold down the power button for 30 seconds before restarting your iPhone.
Reset Network Configuration (Optional) To Fix AirDrop not working on iPhone

Take note of your WiFi network’s password and use the procedures below to reset your iPhone’s network settings.
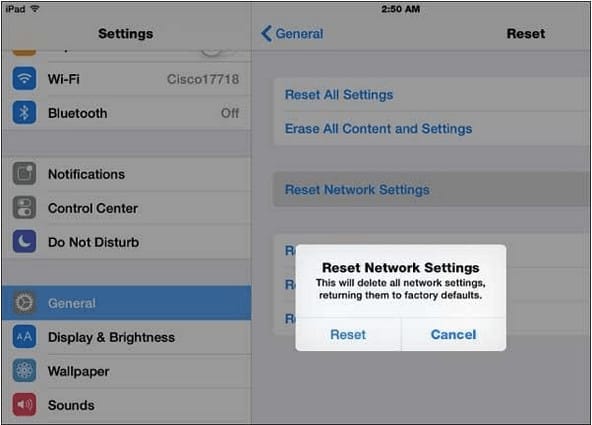
1. Navigate to Settings > General > Reset. 2.
2. On the following page, select Reset Network Settings.
3. Tap “Reset to Confirm” on the pop-up.
Connect to your WiFi network when your iPhone has restarted by entering your WiFi network password.
Examine the reception device
If you still can’t get AirDrop to operate, double-check that the other device from which you’re working or receiving AirDrop data is properly configured for AirDrop.
Make use of the iOS Data Transfer Tool
If none of the above solutions worked, you can use a third-party iOS data transfer software, such as EaseUS MobiMover, to simply share your images between iOS devices.
To use the app, simply follow these steps:
- On your PC or Mac, download and install EaseUS MobiMover.
- Connect your iPhone or iPad to your computer via the USB cable.
- Navigate to Pictures > Photos in EaseUS MobiMover.
- You can choose which images or albums you want to move from one iPhone to another.
- To begin the transfer, select the “To Another Phone” option.
- Check the target device once the process is complete to see all of your data from the Photos app.
Using a third-party tool like EaseUS MobiMover should hopefully solve your AirDrop not working on iPad or iPhone issues.
Final Thoughts
Even after trying all of the above suggestions, you may still be unable to use AirDrop to exchange files. In the comments box, you can share your AirDrop issue. Also, any solution to the AirDrop not working on the iPhone issue is welcome.
